P51 Mustang models
The P51 MUstang was a World War II American fighter aircraft. I have a couple of models, one balsa wood, and one diecast or some such.
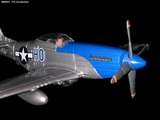
The die-cast one was just a simple kit that didn't take very long to build, being just a fiew pieces, but it looks good. It was pre-painted so all I had to do was screw the fuselage, wings, horizontal stabilizers, and props on.
My father bought me this big balsa wood kit. Guillow's P51 Mustang flying model kit, with tissue paper, wood, everything:
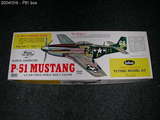
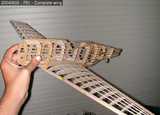
It has complete instructions and plans. I pinned the formers to the plans and built the basic skeleton. 1/16" stringers were used to complete the skeleton. Balsa is easy to work with but you have to be careful as it is very light and breaks easily.
The guy in the hobby shop told me that the bigger-scale kit is easier to work with as it has larger tolerances -- obvious if you think about it. He was right. The downside is that the wing-span is so large, I couldn't get a good flat surface to pin the wings to the plan, so I had to do it in parts. The Mustang's wing is one big piece from left to right.

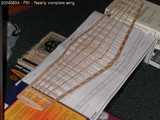
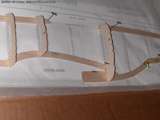
Here's a picture of the fuselage+wing. They need to be covered in a paint-like glue mixture to seal the wood. Sealing the wood helps the glue-paint (same stuff is used) make a good bond between the tissue covering and the wood. Wood is porous and will soak the glue unless it's sealed.
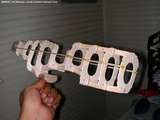
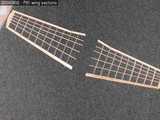
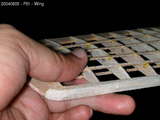
A close-up of the wing, showing the formers, stringers, and the bits of wood that make up the leading edge. The leading edge was a 1/4" square-section length of balsa that had to be sanded to get the correct profile. I didn't sand it enough but the end result is acceptable.
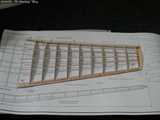
The flat tail sections didn't take long. They were easy to cover in tissue, too. Actually the whole tissue covering process was easy because the glue-paint mixture dries very fast. The picture here shows the tissue before trimming to shape.

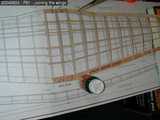
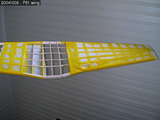
Although the instructions recommend covering each side of the wing (left and right, top and bottom) with one piece of tissue, I used several smaller pieces with no problem. I left a gap in the top middle because that part's going to be inside the fuselage.

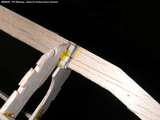
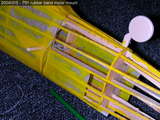
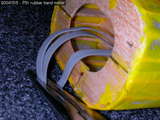
The fuselage was the last thing I covered with tissue -- and found a problem with the instructions. You can't mount any kind of motor after covering. You have to do it before. So with just the tail uncovered, I went through a few contortions to get the rubber band in. A pair of nose-pliers (to pull on things between the stringers) and a paintbrush (to pass the rubber band through the middle) helped. The motor mount dowel holes didn't quite line up, so more BFI was applied.
The pliers held the rubber band while I finished applying the tissue. I used a long piece of thread to attach the paintbrush to the rubber band, and then as a handle on the rubber band to keep it stretched out. Being in a double loop (there are 4 lengths of rubber band inside the fuselage) made it want to make a circle.
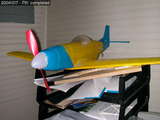
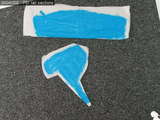
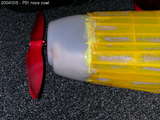
The nose cowl was the hardest part. It, and the air scoop and spinner, is made of some weird plastic. I ended up gluing it, taping it, and painting on some tissue. Then I painted the whole thing a ghastly combination of yellow and blue. I dind't paint the whole thing completely because I was too eager to fly it and haven't gotten around to it since.
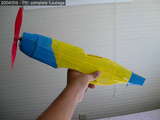
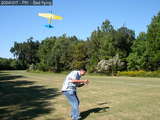
The tail sections were carefully glued on. The wing was easily attached, and the Mustang is ready to fly. Or not. I hadn't balanced it properly nor did I put enough turns in the propeller and it kept crashing until the wing broke loose. I still haven't fixed it.